Consulo IDE with Unity5 in 5 Minutes – Update
March 29, 2015 11:58 am 1 CommentAfter releasing my latest app title I think its time again for some Unity3D development as I have the most fun of game development in my rare spare time. I am on Mac OSX and as mentioned before – i am really not a friend on MonoDevelop. So I sticked to Consulo IDEA again, which has changed in the meantime.
If you start from Zero and you would like to develop with Consulo IDEA and Unity3D – do the following:
1 – Download the latest Consulo IDE version. The binary. Not the source code. There is a special unity3d edition which you can choose.
2 – If you get a runtime exception on the start of Consulo –> Its normal. It seems to have a bug. You can solve this by going to your /Libraries/Application Support/Consulo/ folder and delete the whole “Consulo Data” folder. Its the plugins folder and deleting it will give you a “fresh” install. Now it should startup fine.
3. First we need to configure our plugins. Go to the plugins browser which you can reach from the startup window when you open Consulo. install the following plugins:
- Mono .NET
- C Sharp
- Unity3d
These required plugins may have references to other plugins which will be automatically installed. Now we are almost ready to go. Restart your Consulo IDE and in the meantime Open your Unity3d project (make an backup before!!!) and if you have no code yet in your project, just create an empty C# Script which will inherit from MonoBehaviour.
4. In Consulo IDE, create a new project and choose as target folder the root folder of your project. It will give you a warning that there is already content in that directory but we don’t care. Create your project and in the project navigator you should be able to see the folders and scripts of your Unity Project. If Consulo is not able to resolve MonoBehaviour or any other classes of your script, you may miss a library reference. No problem –> In Consulo IDE , go to “File -> Project Structure” and choose the libraries entry. Choose “+” for adding a new library and add a DLL reference to UnityEngine.dll . You will find it in your Unity App. For me the path was
/Applications ▸ Unity ▸ Unity.app ▸ Contents ▸ Frameworks ▸ Managed ▸ UnityEngine.dll.
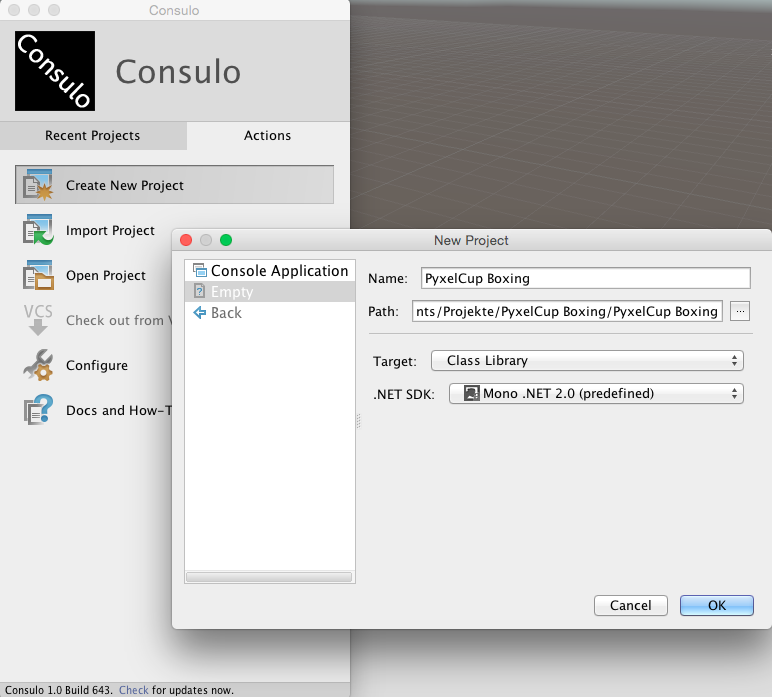
The Image above shows my empty setup
Finished. Once you have added that reference, try to build your project. Voila – it works (hopefully). I know the steps look complicated but basically you should be able to do this setup in 5 minutes.
Now you have a super comfortable IDE to develop for Unity on your Mac 🙂 Have fun!
Update
=======
You can also add Consulo IDE in Unity as your default code editor. It works neatless.
Categorised in: Allgemein
This post was written by Chris
1 Comment
Thanks for the hint! In the first version of Consulo this was not possible I think. I was glad it at least worked – as I dislike MonoDevelop a lot 🙂